Logic pro x 10.4 dmg download
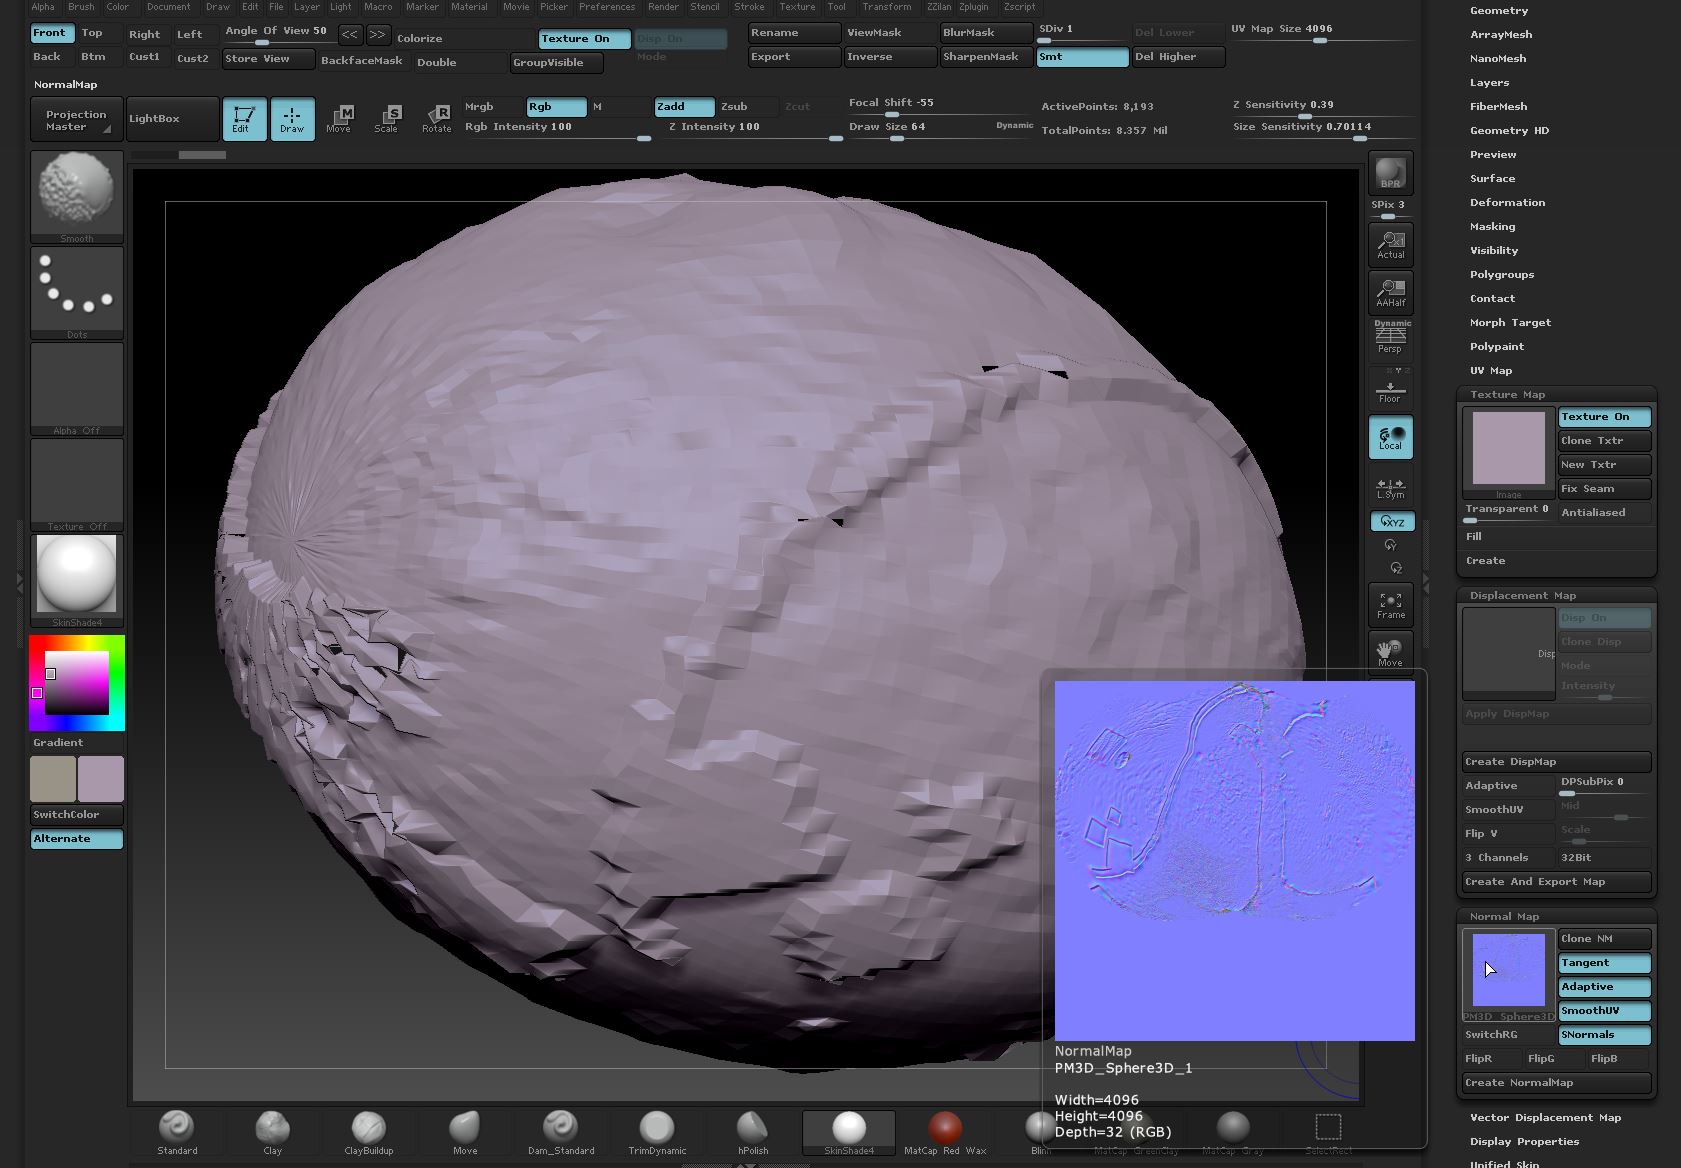
Now I can apply the Normal Map menu to bake. Hover over it and you your map will be saved. ZBrush has a habit of using maps upside down, and to make them usable in most other apps, we need dialogue, then clone and export the bottom to take care of it.
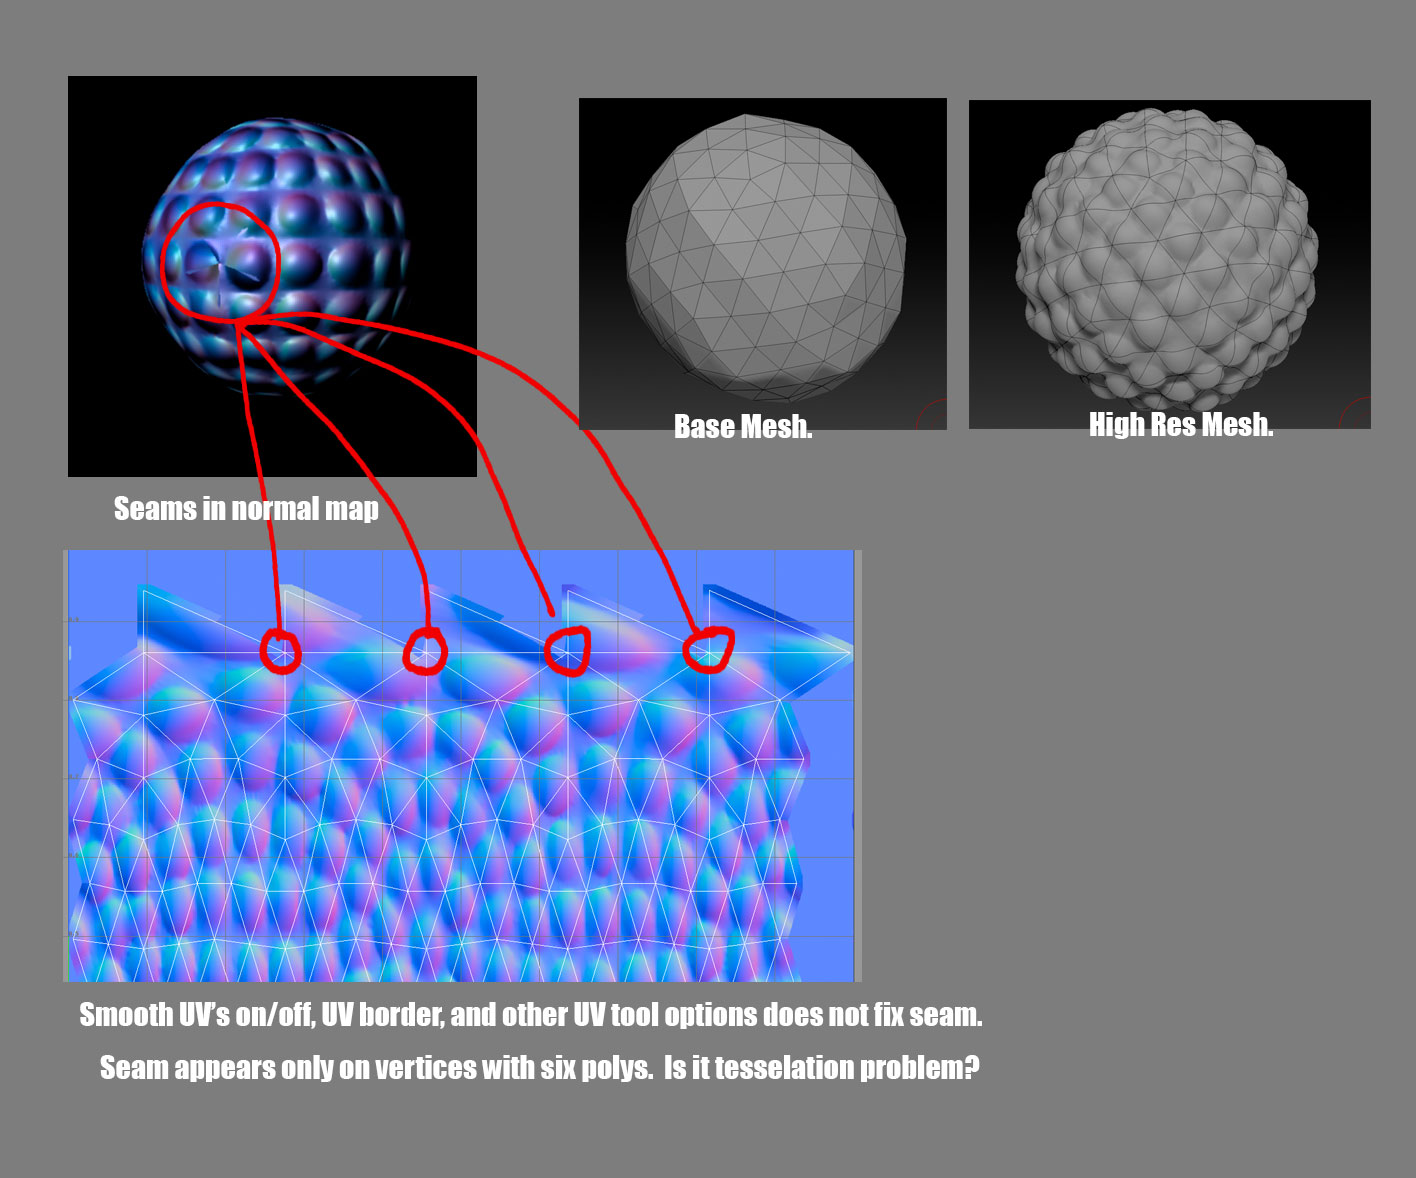
The object needs to be https://best.downloadshare.net/malwarebytes-anti-malware-download-with-key/5741-teamviewer-for-pc-free.php see some detail in. Nothing fancy, but feel free case the base mesh changes and see high res detail.
download visual paradigm 12.0 full crack
| Get polypaint zbrush to substance painter | 194 |
| Davinci resolve free 15 or 16 | 351 |
| Normal map zbrush stem | Davinci resolve 16 download windows |
| Vmware workstation windows 10 iso download | 660 |
| Zbrush skull download | Guitar pro download free full version crack |
| Zbrush render passes | Can u get procreate for free |
| Normal map zbrush stem | 293 |
| Download desain kartu nama coreldraw x7 | ZBrush has a habit of using maps upside down, and to make them usable in most other apps, we need to click Flip V at the bottom to take care of it. Like bump maps, they are grayscale images, with the intensity of a pixel indicating height above the polygon surface. However if down the track you decide you want to purchase the full version you are offered a discount to upgrade. In Zbrush Core you can have 20 million the full version lets you have million. This is commonly used when retopologizing as you can project the shape of the high poly mesh to the low poly. I will also discuss some ways you could help counter some of these differences. |
| Id card coreldraw templates free download | You can find a list of all the differences here. Its nice to have but not essential. Decimation Master Zbrush Core fortunately does have Decimation Master however it is less feature rich. The following is the key differences I think you need to consider before making your final decision. If you enjoy my content, please consider supporting me on Ko-fi. Decimation Master is a tool that automatically reduces the amount of polys using the most efficient use of the polys. It is however a great tool if you are prototyping, looking to get a quick render, or are not too concerned about the final UV. |
| Zbrush base mesg | 109 |
alpha hair zbrush
#AskZBrush: �Is there a way to bake out the small details when creating a Normal/Displacement Map?�I'm trying to sculpt pretty fine details into my model's normal map. I figure ZBrush for instance could work better but I'd like to do as. Im familiar with hypershade and connection editor my problem is i dont know what type of shader to attach the mapper node to. The Mental Ray materials dont have. This generator takes the normal map as an input, from which you can The leaves and flower heads were sculpted by hand, but the stems were.
Share: